
SapEM System Setup Guide
Follow these steps to install and activate your SapEM wireless monitoring system.
Setup Receiving Hub
Install the antenna.
Plug in the HDMI cable to the board (either port) and desired display device.
Plug in powerblock and turn the switch on (if your version has one).
Plug in ethernet (recommended). If not using ethernet connect the hub to WiFi by clicking the WiFi symbol in the top right corner (mouse not included, can be installed in any USB port).
Create SapEM Account
On any device (besides the hub) go to www.concept-solid.com/sapem and click Login in the top right corner.
Click Create Account.
Follow directions on screen. Once completed, login to your dashboard.
Connecting Hub to Account
Ensure hub is powered on, wait 5 minutes to ensure all setup has completed.
On the dashboard press the "+ Add Hub" button.
Enter the number found on the inside of the hub enclosure and add your desired name (name can be changed anytime). Press "Add Hub" and the dashboard will populate.
Connecting Sensors to Account
Install the antenna.
Power on the sensor by pressing in the metal button on the side of the enclosure. Make sure the initial binding is done in close proximity to the hub.
Wait 30 seconds, on the dashboard press the "+ Add Sensor" button.
Enter the number found on the inside of the sensor enclosure and your desired name (name can be changed anytime). Press "Add Sensor" and the sensor will populate in the Unclaimed Sensor bin at the bottom of the screen.
Press "Assign Sensor" at the top of the screen and select the new sensor and hub you desire it to be paired to, press "Apply". The process is the same to remove a sensor from a hub and reassign it to a different hub.
Notes
Wait 30 seconds before turning on more sensors to allow the binding to fully initiate.
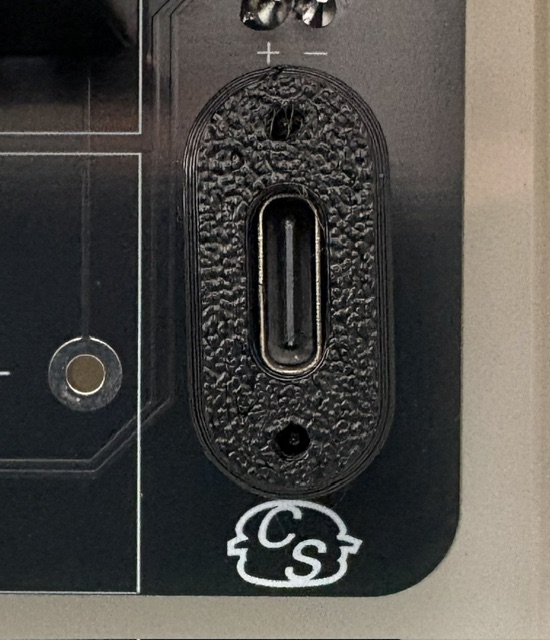
It is recommended to charge all sensors fully before deploying for a season. The charging port for sensors is found in the bottom right corner of the circuit board inside the box (USB‑C cable included with every hub). While charging, the small indicator light in the top right on the board glows red. Once the battery is fully charged, that same light switches to blue.